Kubernetes Getting Started

Overview
As we saw in the first post, Kubernetes in an orchestrator for containerized applications, in this post we will use a Kubernetes APIs Object to deploy containerized application using Docker single node cabinets.
In general, there are two ways to deploy application in Kubernetes:
- Imperative mode using kubectl command
- Declarative mode using Yaml or json configuration files
Declarative mode is the most common used mode in production project, it allows to manage the infrastructure as code, by storing your deployment definition in a git repository for example.
Imperative mode is mainly used for troubleshooting.
In this post we will focus on the declarative mode to install Hello world application the first file contains the definition of the deployment API object, I am assuming that you have basic knowledge of a docker And containerized application.
The Docker image that will be used is gcr.io/google-samples/hello-app, this docker image exposes a web server application on port 8080.
Deployment API Object
To deploy 10 replicas (instances of the docker image), copy the content of the ymal definition below in a new file named deployment.yaml, then execute the definition using the command below
kubectl apply -f deployment.yaml
apiVersion: apps/v1
kind: Deployment
metadata:
  name: hello-world
spec:
  replicas: 10
  selector:
    matchLabels:
      app: hello-world
  template:
    metadata:
      labels:
        app: hello-world
    spec:
      containers:
      - name: hello-world
        image: gcr.io/google-samples/hello-app:1.0
        ports:
        - containerPort: 8080
To check the status of the deployment you can use the command below, you should get deployment “hello-world” successfully rolled out
kubectl rollout status deployment hello-world
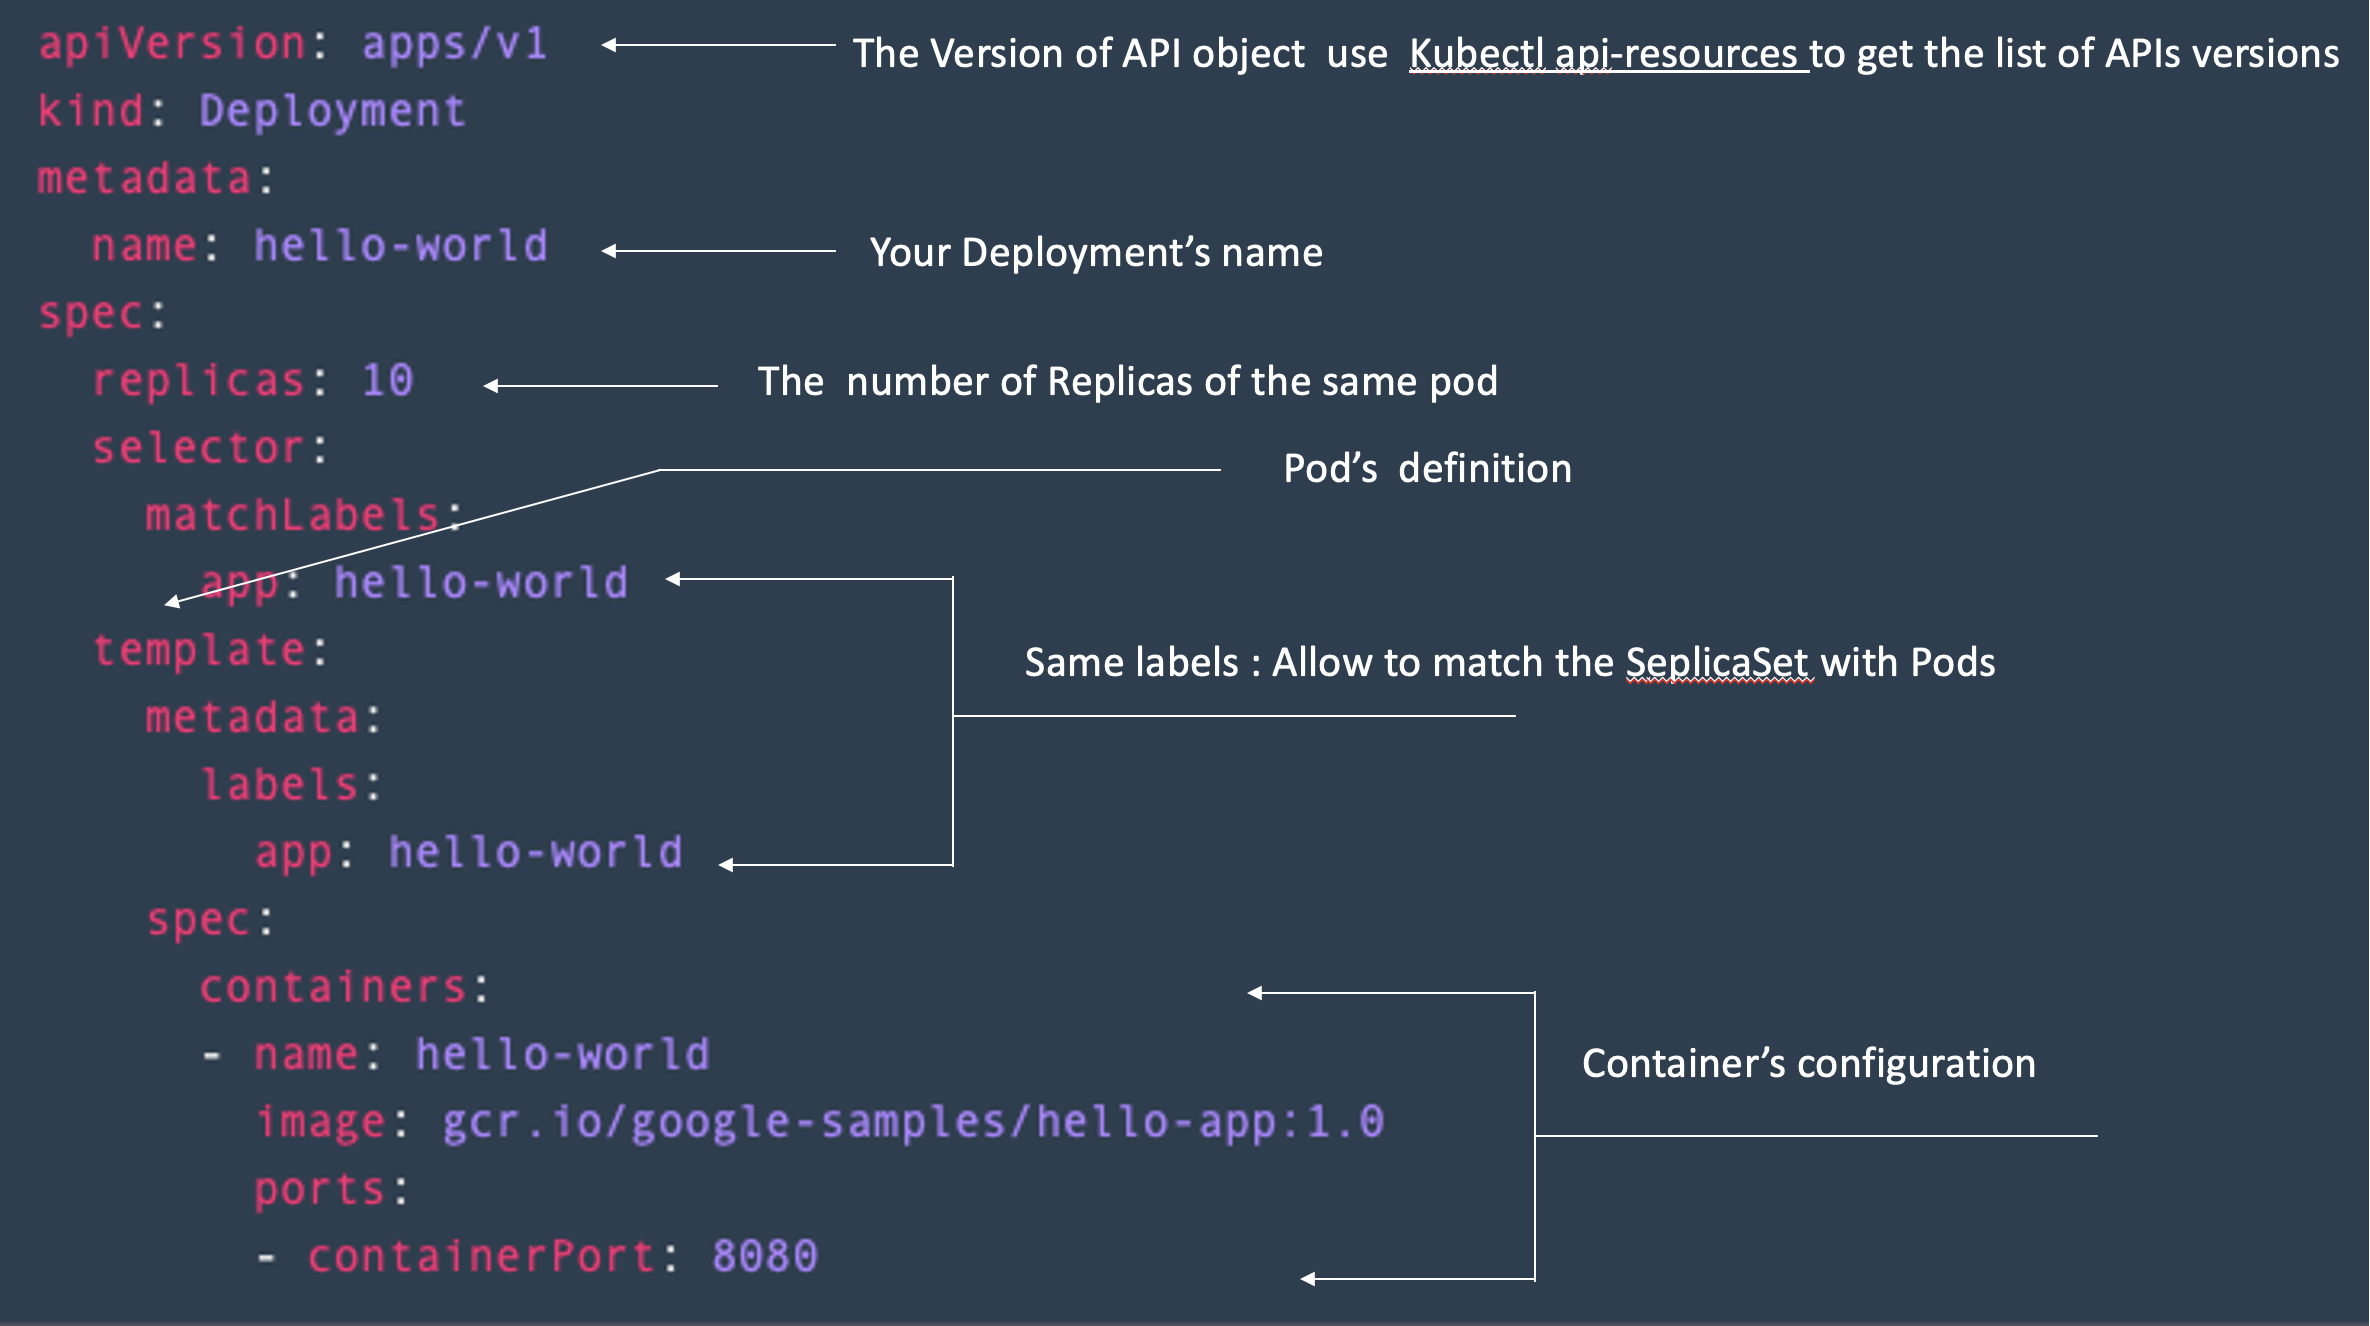
Let’s explore the definition of deployment API object.

Know we deployed 10 replicas of the hello-world application, it means we created 10 pods containing the same image container, let’s check that with the command below.
kubectl get pod -l app=hello-world
This command will display 10 pods belonging to the same deployment (same replicas set), let’s have fun, and delete manually one pod, let’s assume that the pod crashed for some reason and it is exited
POD=$(kubectl get pod -l app=hello-world | awk ' {print ($1)}' | grep hello-world | head -n 1)
kubectl delete pod $POD
The first command gets the name of the first pod in the list, and the second one deletes the pod, once the second is executed you will get the confirmation message that the pod is deleted
Let’s try to list again pods belonging to hello-world deployment
kubectl get pod -l app=hello-world
And the magic happens :) we still have 10 replicas (10 instances of the hello-world application), one of them has new age ‘just few minutes’, it means when you depleted the POD, the deployment controller created a new pod to ensure the desired state (10 replicas)
Every Pod has its own private IP address, this IP address is only accessible from within Kubernete cluster, using -o wide option you can check the IP address of each pod
kubectl get pod -l app=hello-world -o wide
If you want to access to one pod, from your terminal, ‘it can be useful for troubleshooting’, you can create a tunnel between your terminal and Kubernetes cluster
POD=$(kubectl get pod -l app=hello-world | awk ' {print ($1)}' | grep hello-world | head -n 1)
kubectl port-forward $POD  8080:8080
After that you can access to http://localhost:8080 using curl command or your favorite web browser
Service API Object
This method allows you to access only to one of your pods, in the production scenario, you need to use all your 10 replicas with the same endpoint address, so we need to add a Service object to load balance traffic between all the replicas
Copy the content of the ymal definition below in a new file named service.yaml than execute the defintion using th command below
kubectl apply -f service.yaml
apiVersion: v1
kind: Service
metadata:
  name: hello-world
spec:
  selector:
    app: hello-world
  ports:
  - port: 80
    protocol: TCP
    targetPort: 8080
You can check the service creation with commad below
kubectl describe service hello-world
You will get a new service with an IP address, the range of the IP address is different from the range of pods IP address, but this IP address still accessible only from within the cluster, note the type of the service is cluster IP, which is the default services' type
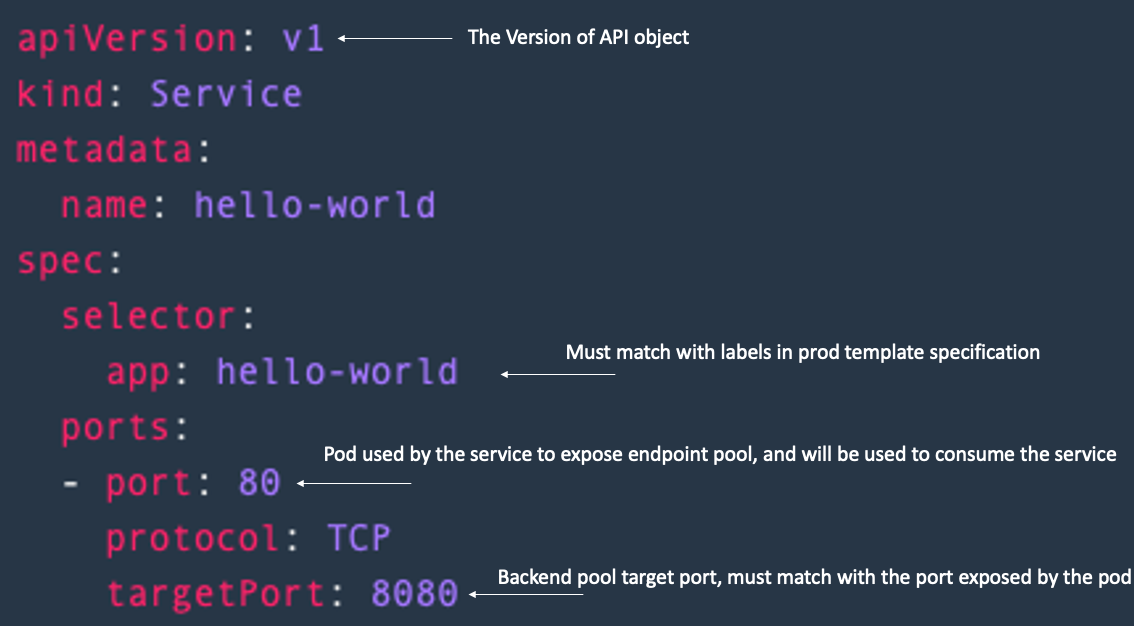
Let’s explore the definition of service API object

To check the list of endpoint pool of your service you can use this command
kubectl describe endpoints hello-world
If we want to expose the service outside of the cluster, we need to update our service and use NodePort mode, this mode exposes your service to your cluster nodes using a specific port number (The default node port range for Kubernetes is 30000-32767)
apiVersion: v1
kind: Service
metadata:
  name: hello-world
spec:
  type: NodePort
  selector:
    app: hello-world
  ports:
  - port: 80
    protocol: TCP
    targetPort: 8080
    nodePort: 30000
Now your application is exposed outside of the cluster you can use any node IP address to access to the service, in our case we can use localhost or 127.0.0.1 to access the service.
curl -get http://localhost:30000
If you execute the curl command many times you will get the http response from different pods, your service is using the round robin algorithm to load balance the load between your 10 pods.
The third type of services is LoadBalancer, this type is only used when you use managed cloud Kubernetes cluster, in this case, the cloud provider provision a load balancer for a service.
Ingress API Object
anther way to expose your services outside of the cluster and the most common used in production environnemt is ingress controller.
The ingress controller is a reverse proxy, using only one entry point to the cluster NodePort or LoadBalncer, and routes the traffic to the service within the cluster using path based routing ingress or domain based routing
Ingress controllers are not started automatically with a cluster, list of supported ingress controller is available in the this link Ingress Controllers
In this post we are going to use contour ingress controller witch is based on Envoy proxy To install the countour ingress, we can use the official manifest from contour project
kubectl apply -f https://projectcontour.io/quickstart/contour.yaml
Once contour ingress is created we need to create the route for our hello-world service, let’s start by changing the service type to ClusterIP
apiVersion: v1
kind: Service
metadata:
  name: hello-world
spec:
  type: ClusterIP
  selector:
    app: hello-world
  ports:
  - port: 80
    protocol: TCP
    targetPort: 8080
Then we create the ingress configuration file hello-world-ingress.yaml
apiVersion: networking.k8s.io/v1
kind: Ingress
metadata:
  name: hello-world
spec:
  rules:
    - host:
      http:
        paths:
        - path: /hello-world
          pathType: Prefix
          backend:
            service:
              name: hello-world
              port:
                number: 80
You can test your configuration using the command below
kubectl apply -f curl -get http://localhost/hello-world
You deployed a simple hello-world application using 3 Kuberentes API objects: Deployment, Service and Ingress!!